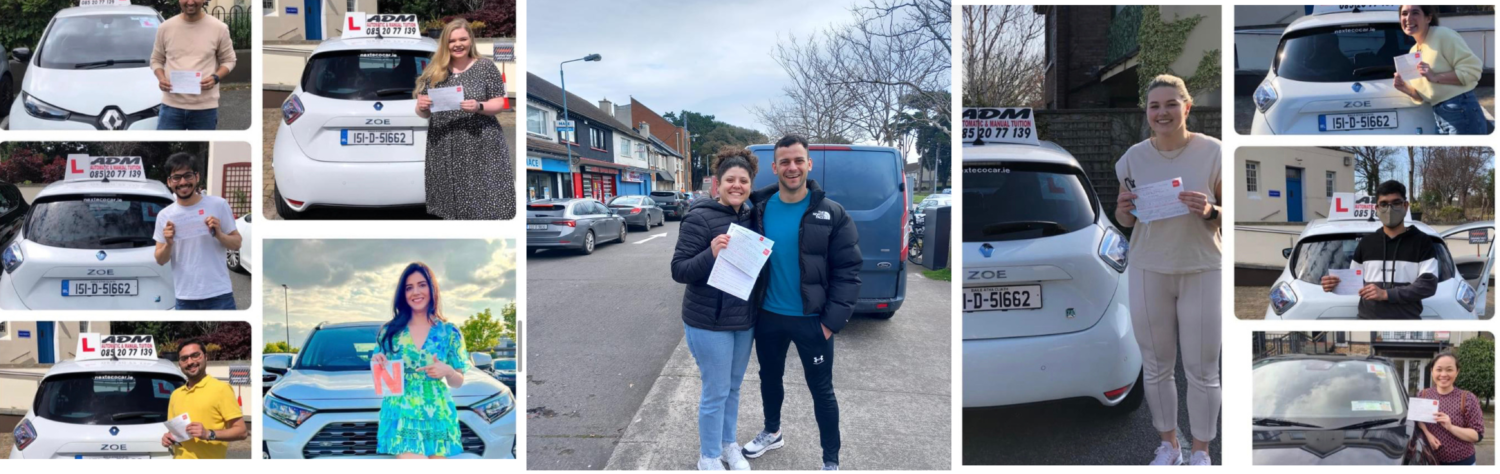
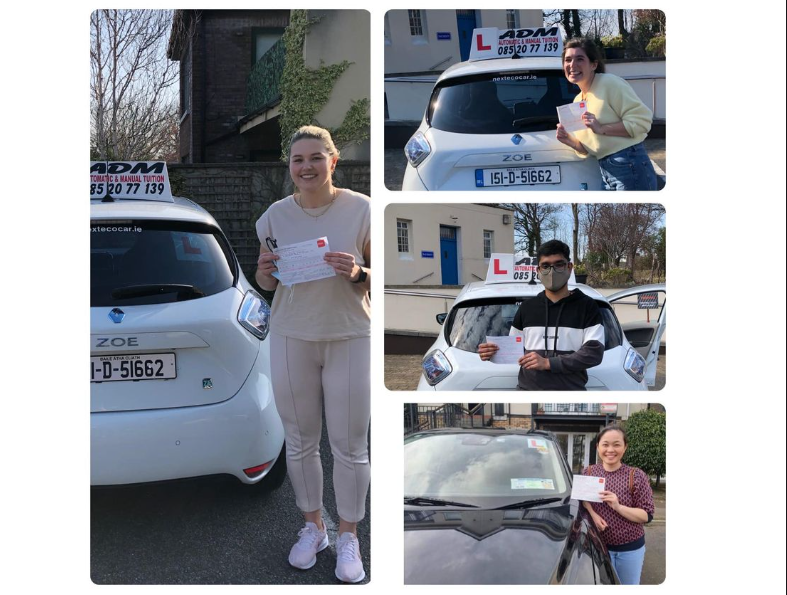
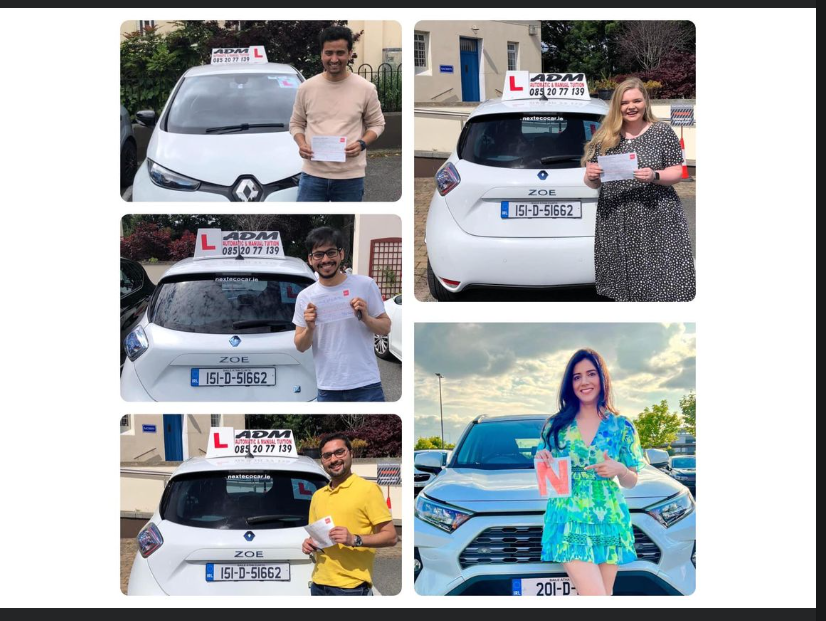
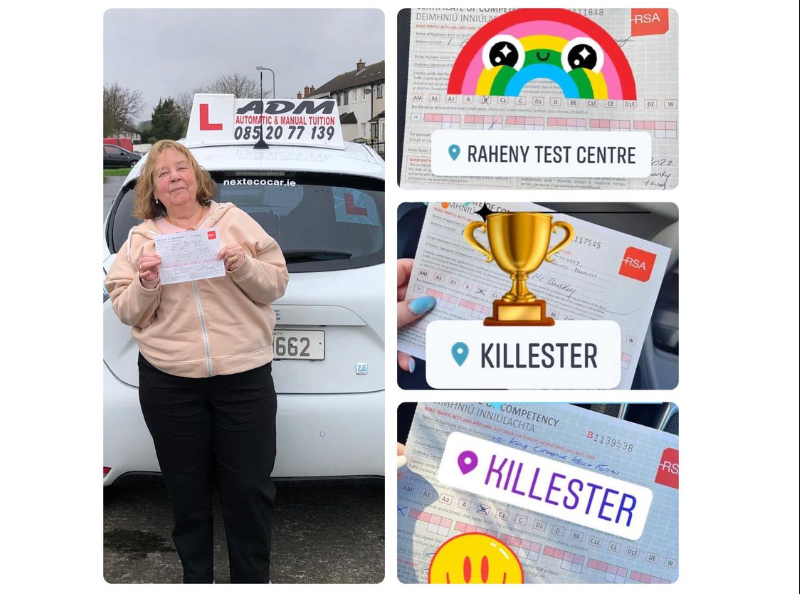
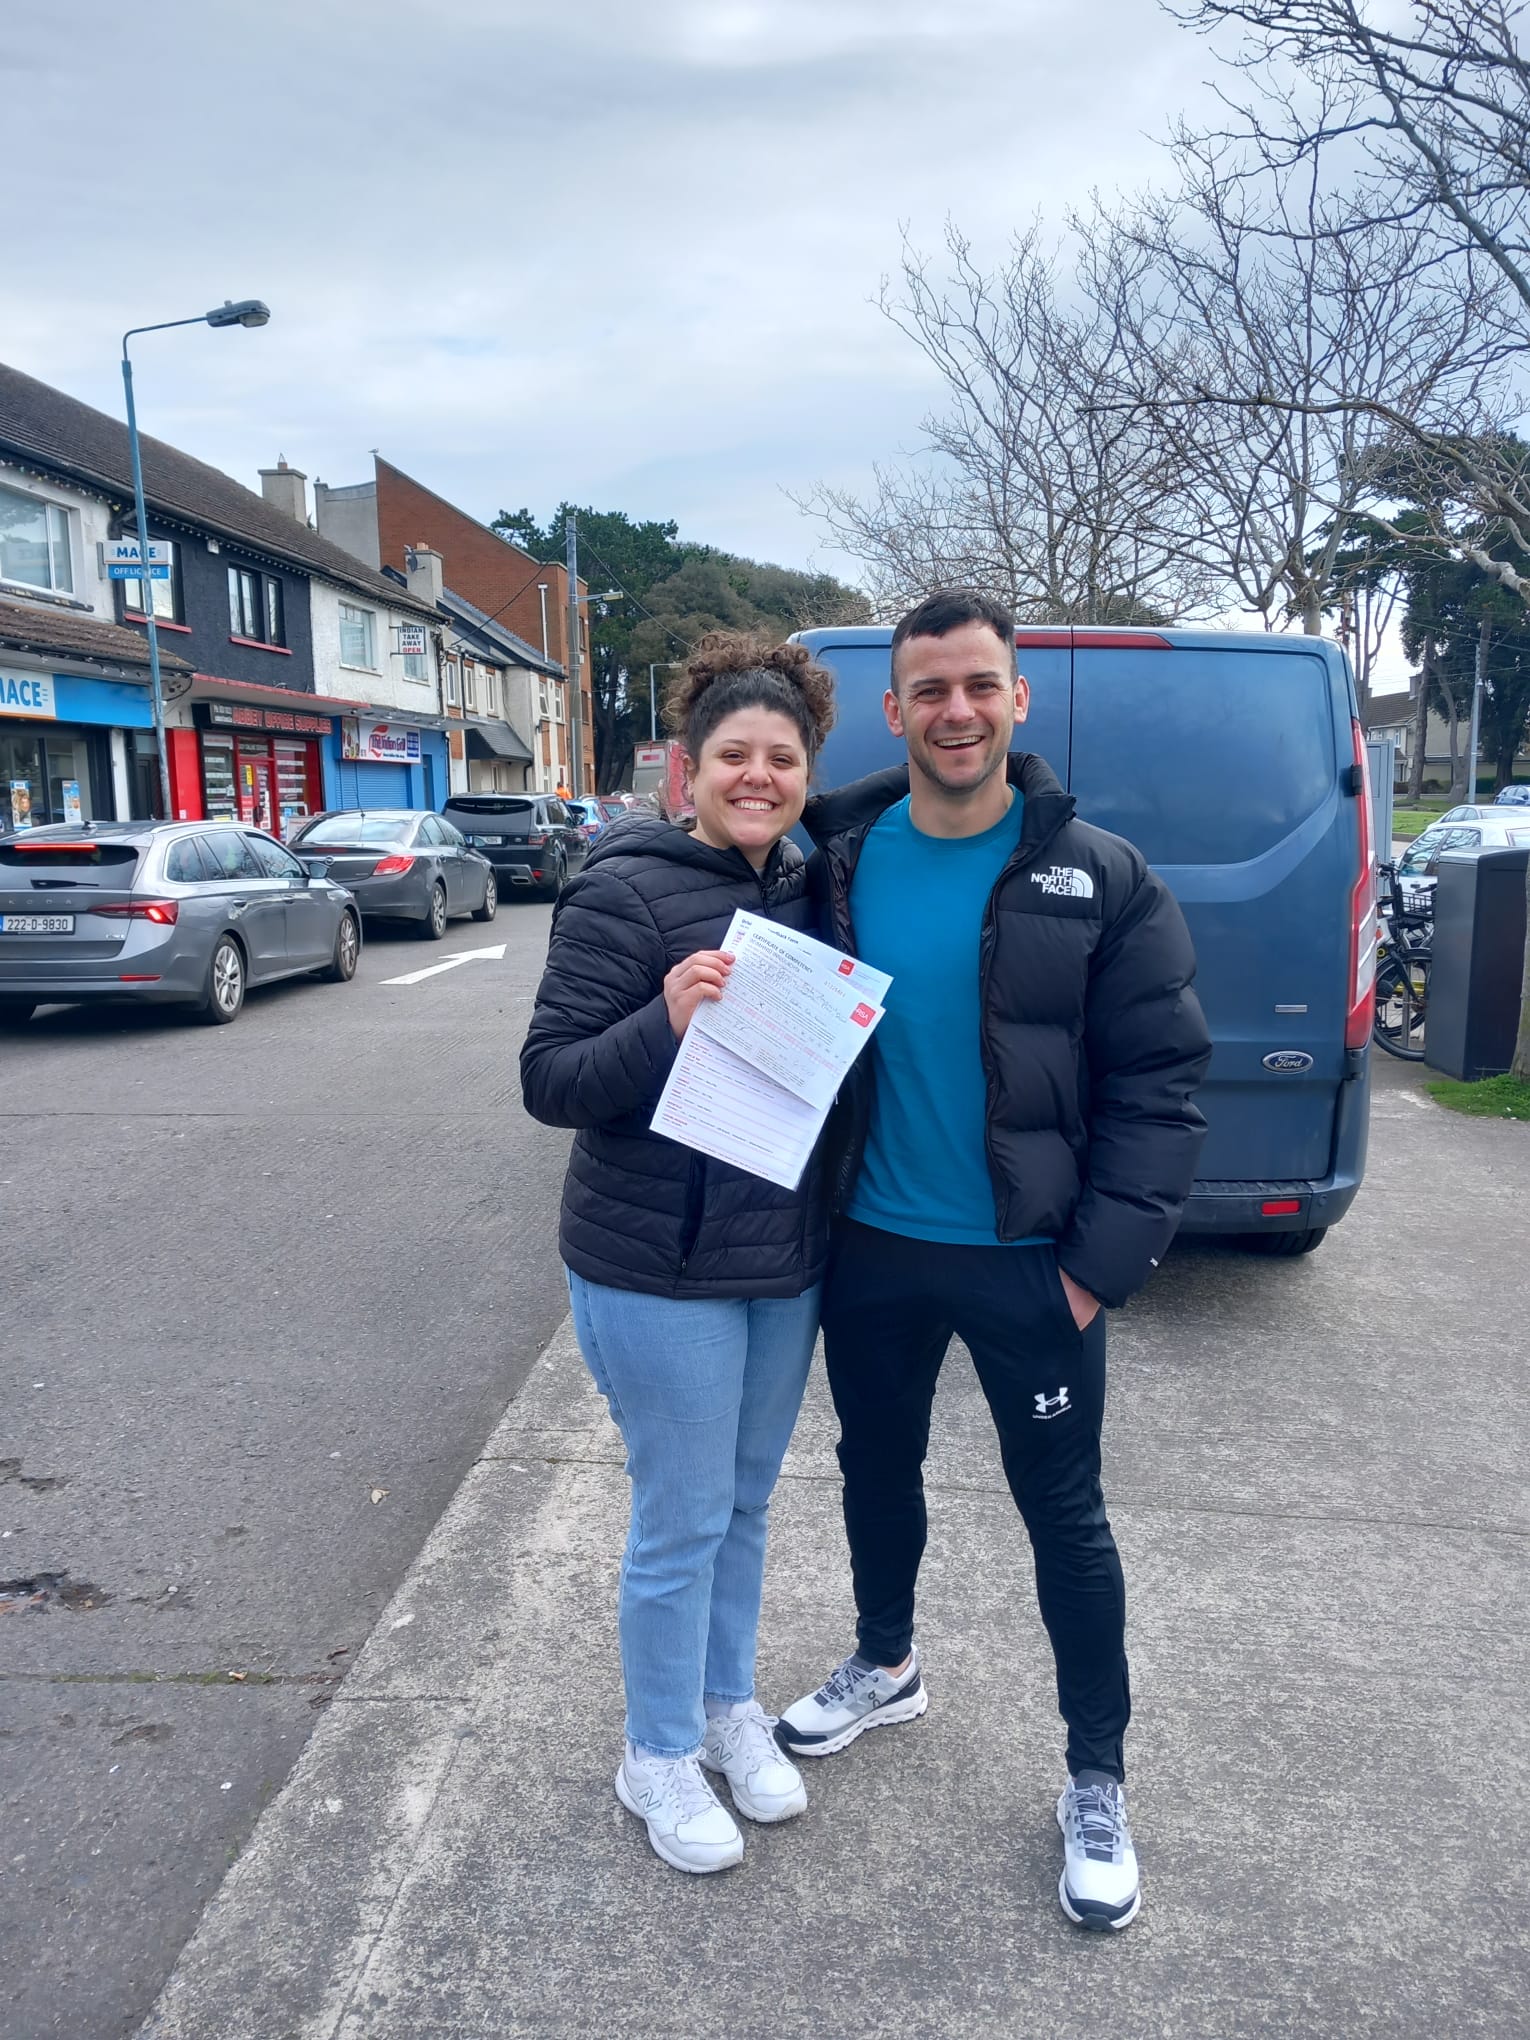
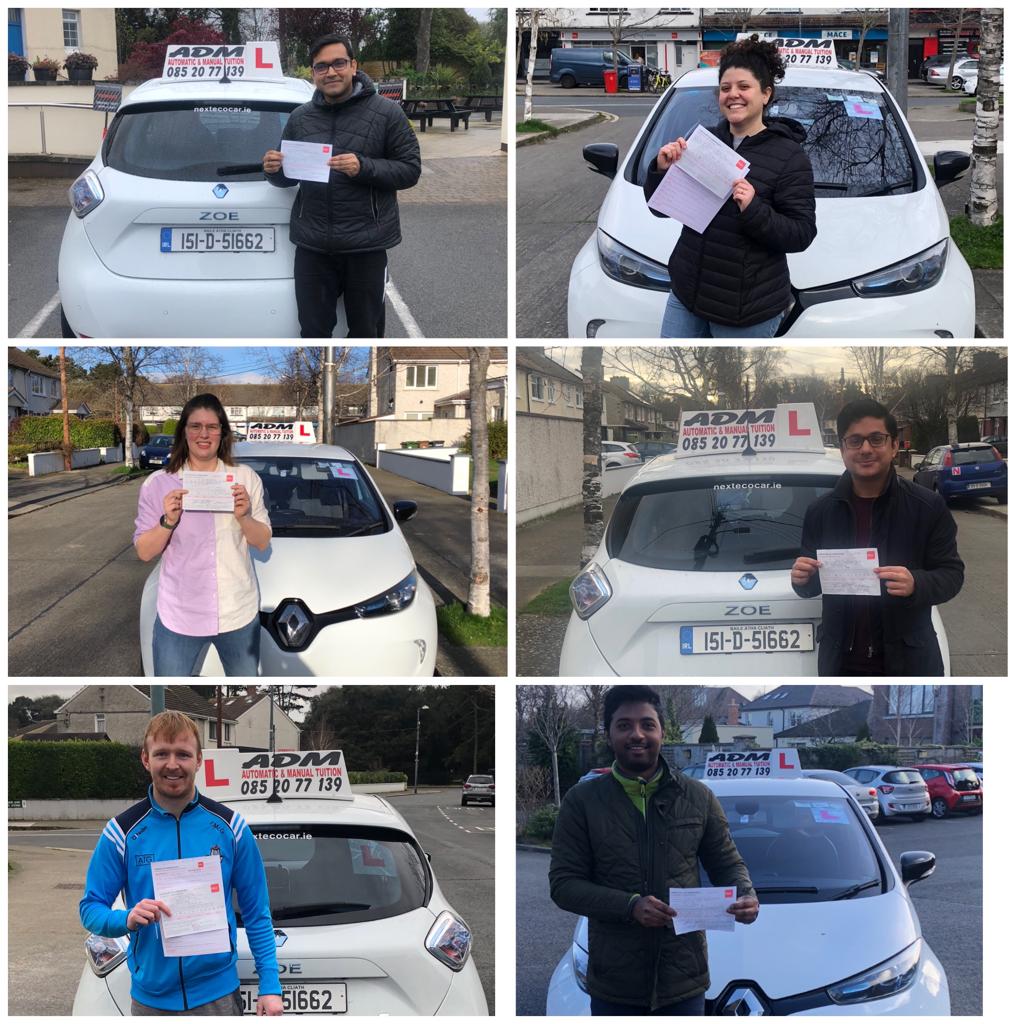
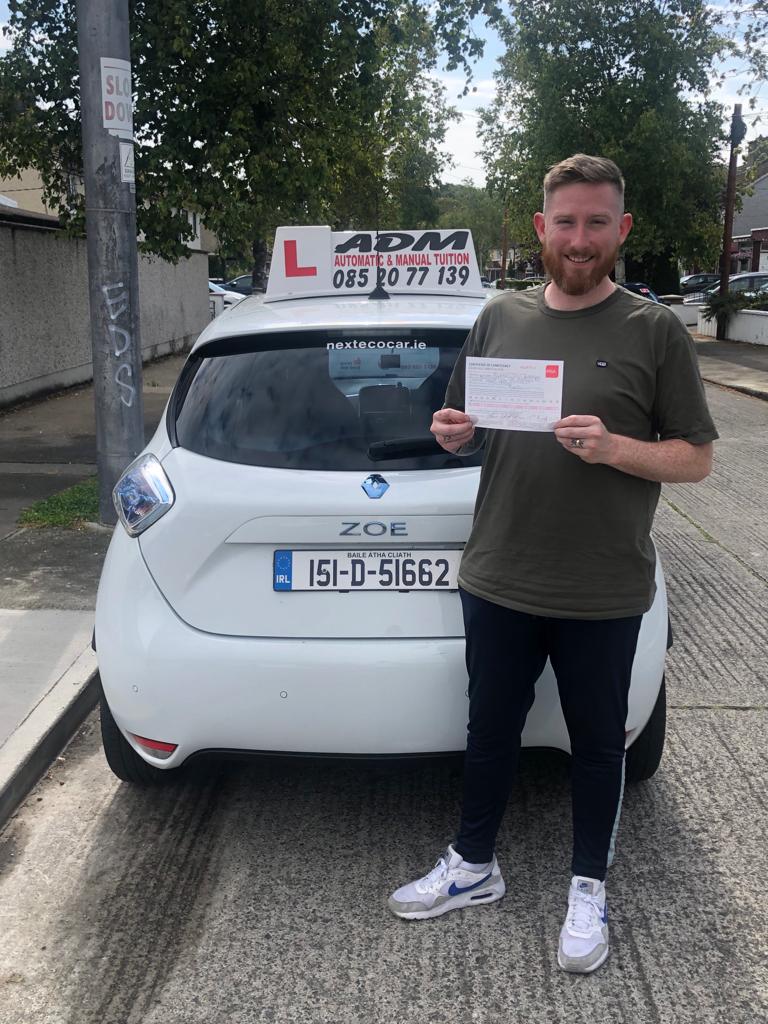
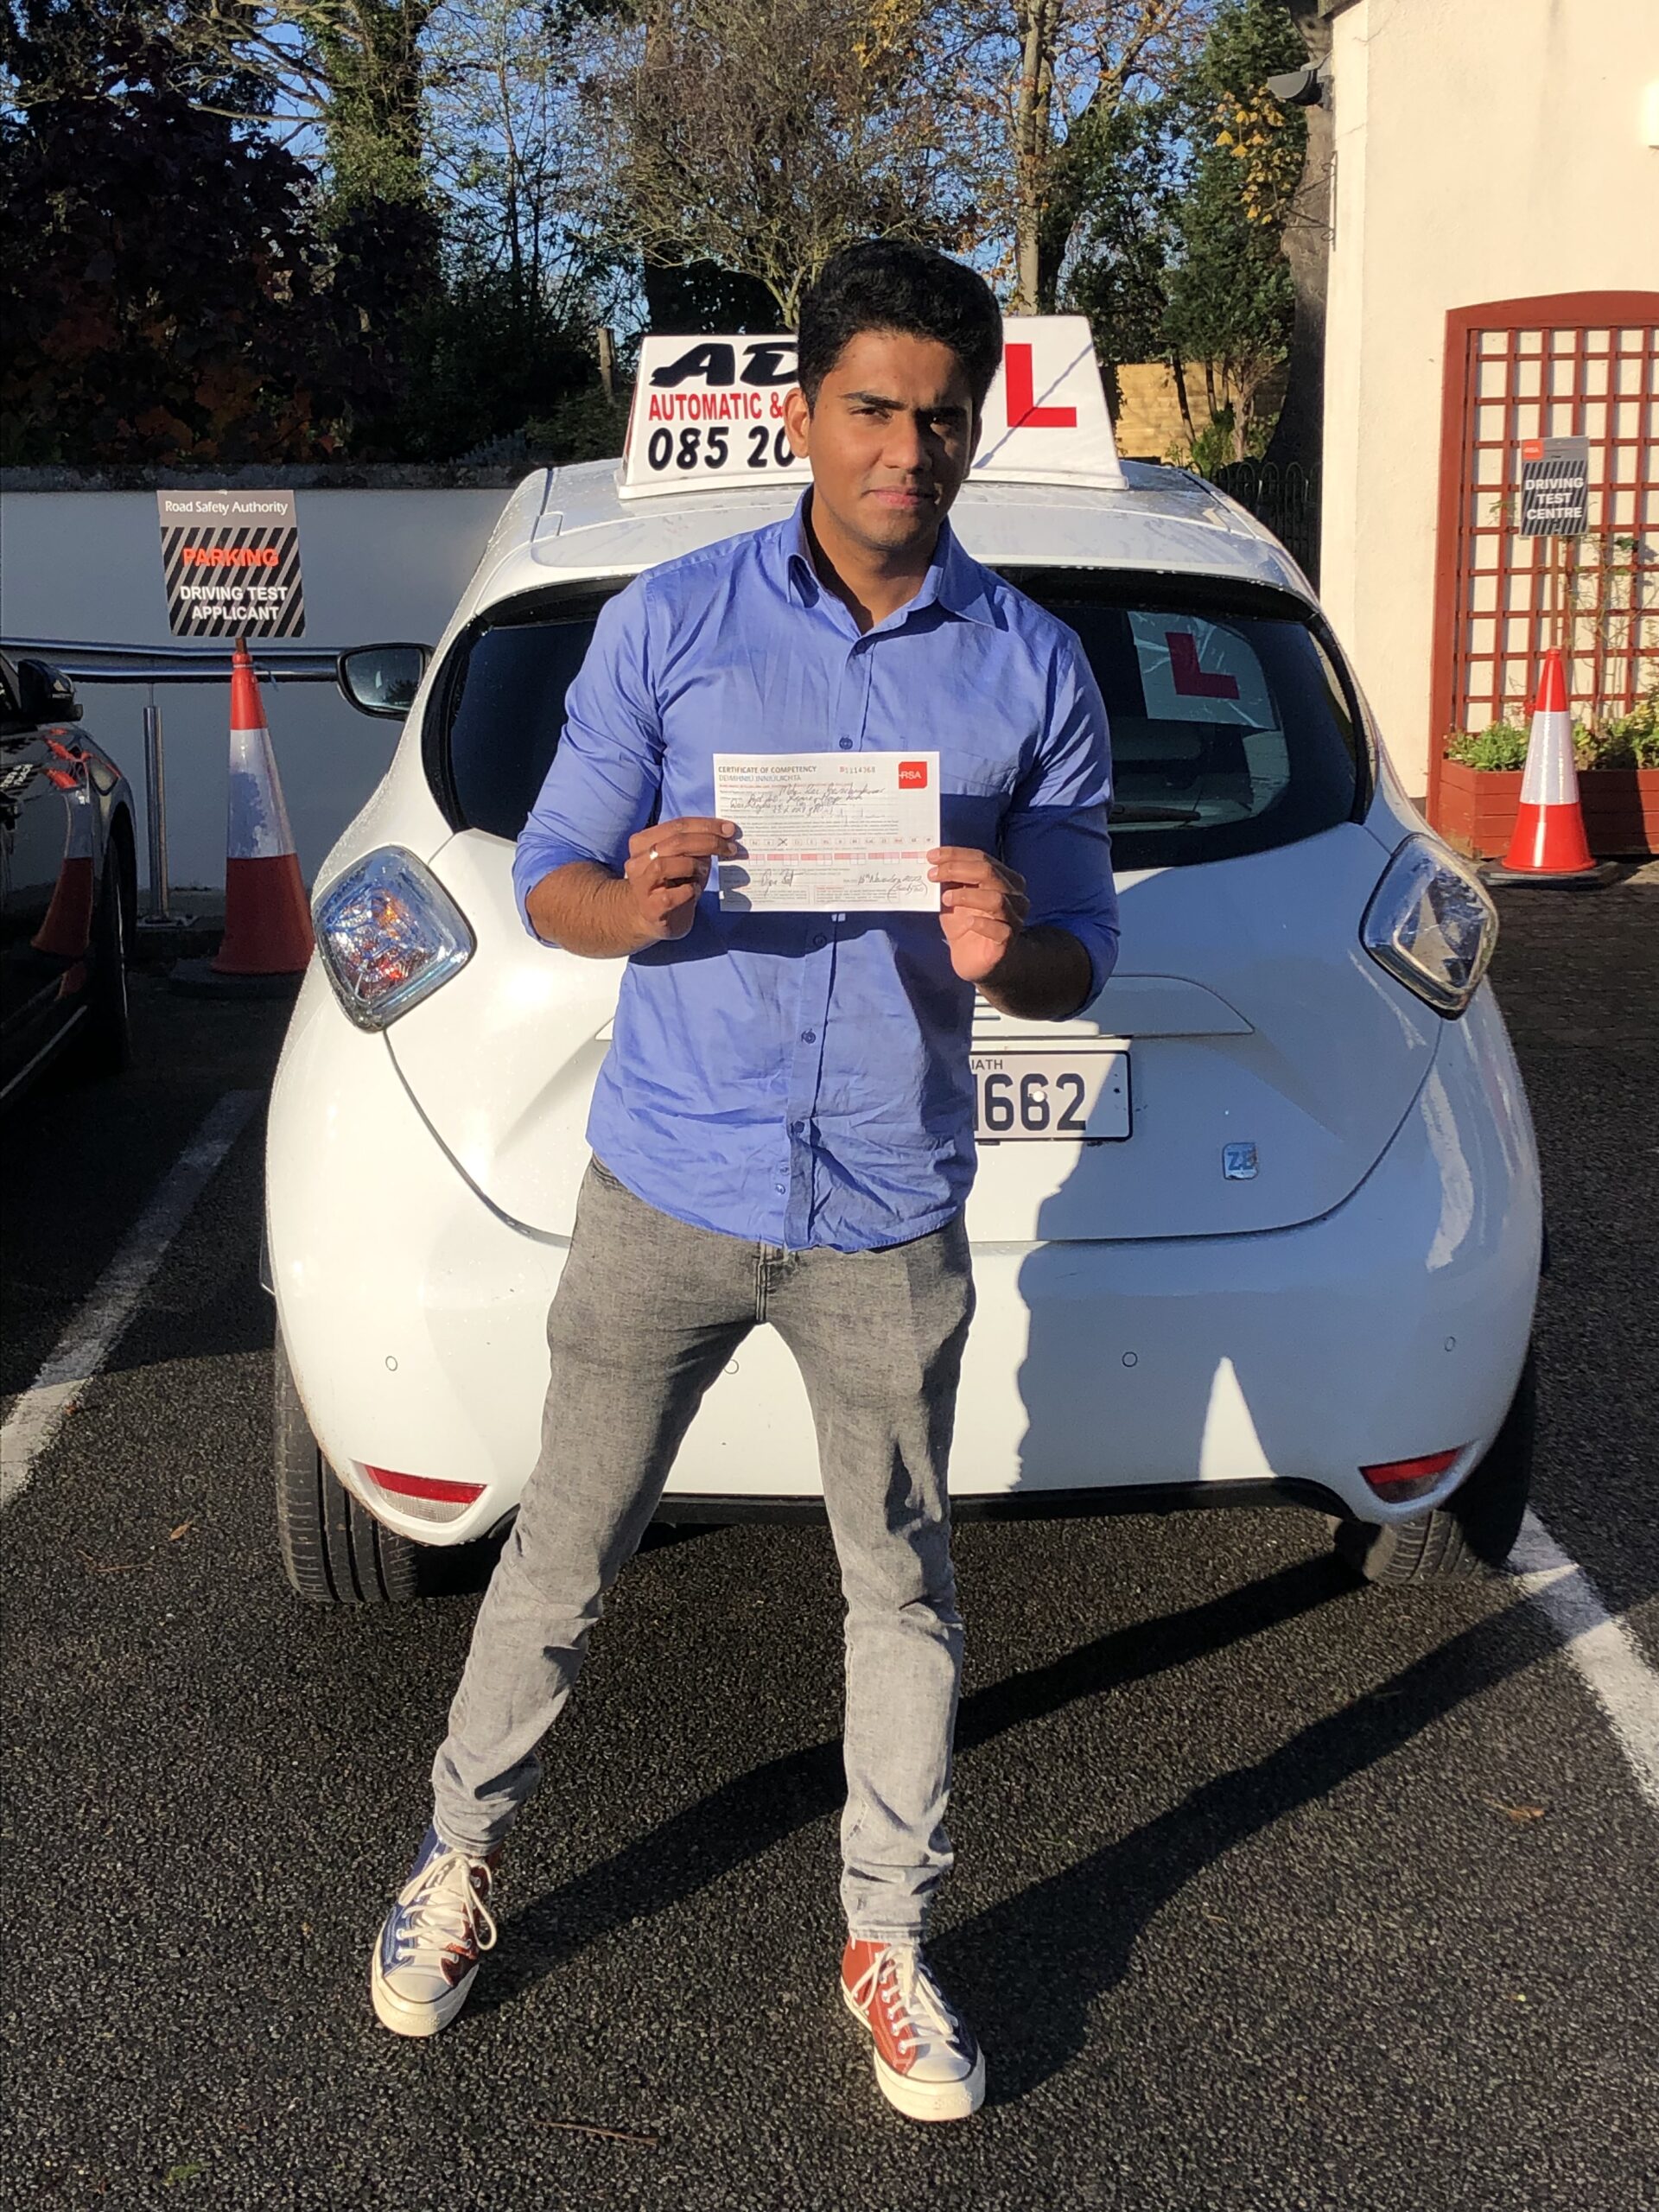
So many happy students passing their driving test in Raheny and Kilester.
It does fill me with joy seeing all these smiling faces. The road to your full license can have lots of ups and downs but when we follow the process, we always get you there in the end.
If you would like to book automatic driving lessons in Raheny or Kilester areas, you can reach me on 0852077139
Today’s video we will be covering Navan Driving Test Route 1. This is the first Navan test route ever recorded for YouTube. In this Navan driving test route, I will be tested by our Navan driving instructor EJ. EJ will be imitating a Navan driving tester and he will mark me as a driving test student attempting my driving test in Navan. See the video below for Navan Test Route 1.
Unfortunately, I wasn’t able to get inside the Navan driving test centre because the gates were closed so we had to begin our test at the front gate. I will share 5 tricky things to look out for in this Navan driving test route.
1. The Hill Start at the Beginning of Your Driving Test
One of the first challenges on the Navan driving test route is a steep hill with a stop line before joining the main road. This tricky hill start comes right at the beginning of the test. In the video, you’ll see I use my handbrake and pull it all the way up due to the hill’s steepness, preventing my car from rolling backward.
How to Avoid Rolling Backward on a Hill
To avoid rolling backward on this or any hill, use your handbrake. When you’re ready to move, bring the clutch to the biting point and hold it steady. Apply some accelerator and keep both feet in position. Release the handbrake only when it’s safe to go, which should prevent the car from rolling backward.
If you’d like to book pretest driving lessons or EDT driving lessons in Navan, click below:
The extremely narrow country roads on the Navan driving test route are worth mentioning because they are quite unusual. The speed limit here is 60 km/h, and if it’s safe, the driving tester will expect you to reach this speed. When the road narrows due to oncoming vehicles, ease off slightly.
Position on Narrow Country Roads
Maintaining the correct position is crucial on these roads, especially when there are no markings. Stay on the left side and maintain a good road position on bends.
3. Tricky Right Turn on a Left Bend
At 8:16 in the video, you’ll see a right turn on a left bend that can be problematic for many learner drivers. Often, learners drive straight up to the turn instead of following the centre line’s curve. Additionally, they might mistakenly treat it like a T junction and give right of way to cars from the right. However, we have the right of way.
Trick for Nailing These Right Turns
When making a right turn like this, align the front of your car with the centre line you want to follow. If you need to bend left with the centre line, do so. Once the front of your car is in line, look where you’re going. Watch the video below for a demonstration of this turn.
4. Turning Right at the Traffic Lights
Turning right at the traffic lights on Navan test route 1 (12:10) can be confusing. In this case, the solid green traffic light usually means you proceed to the middle of the junction and wait for oncoming traffic to pass before turning. However, it appears that we have the right of way at these lights. Ideally, a green right arrow should be displayed to make this clearer.
Tips for Turning Right at the Traffic Lights
Turning right at traffic lights can be confusing. Watch the video below for a full explanation of what to do when turning right at traffic lights during your driving test.
5. Reverse Around the Corner
Lastly, let’s discuss the reverse around the corner on this Navan test route. This maneuver is straightforward, but always remember to move off correctly from a parked position once you finish the reverse.
Tips for Reversing Around the Corner
Watch the video below for a detailed guide on reversing around a corner during your driving test.
Conclusion
Navigating the Navan driving test route presents several challenges, from steep hill starts and narrow country roads to tricky right turns and confusing traffic lights. By understanding these specific difficulties and practicing the provided tips, you can improve your driving skills and boost your confidence. Whether it’s mastering hill starts, maintaining the correct position on narrow roads, executing complex right turns, or reversing around corners, preparation is key.
If you need additional support, consider booking pretest or EDT driving lessons in Navan to further enhance your readiness for the driving test. Good luck! Click here to book.
Do you need to book your driving test? You can access the RSA website below
5 Tips To Help You Pass Your Driving Test At Raheny Driving Test Centre
In today’s video I will be showing you 5 tips to help you pass your driving test at Raheny driving test centre. The driving test in Raheny can be very challenging. Lots of people fail their driving test in Raheny for not knowing these tips. Take a look at the video below to see the tips and tricks to help you pass your driving test at Raheny driving test route.
Book your Driving Lessons in Raheny
If you would like to book driving lesson for the Raheny driving test route, please click here
1. Turning right at the traffic lights at Artane
To start with, in this Raheny test route 2024 video, we talk about turning right at the traffic lights at Artane. This right turn at the traffic light causes so many people to fail their driving test in Raheny driving test centre. In addition, driving test applicants generally fail their driving test for “progress at traffic lights” for failing to go up to the middle of the junction when they have a full green light. Therefore, turning right at traffic lights like this can be so confusing and I will add a video below to help explain how to do this correctly.
Moreover, you can click here to read the RSA marking sheet guidelines and read the section for progress and section’s A,B and C cover progress at traffic lights
2. Mini roundabouts around Raheny driving test routes
Secondly, we will be talking about the mini roundabouts around Raheny driving test routes. The driving test routes in Raheny have so many mini roundabouts. The mini roundabouts around the Raheny driving test route causes lots of problems. The mini roundabouts from the video above are only a small few of them. The reason why I added these mini roundabouts to the video was because I was demonstrating how narrow they are and explaining that I am using 1st gear when I turn right at the mini roundabouts at Raheny driving test routes.
3. The Artane roundabout.
In the third clip of Raheny driving test route-tips to pass video we talk about the Artane roundabout. So many driving test applicants fail their driving test in Raheny driving test centre for “position at roundabouts” for being in the wrong lane when driving straight through the roundabout, second exit. In the video, I explain about the road markings and how to know what lane you are supposed to be in.
If you want to pass your driving test at Raheny driving test centre, why not join my YouTube membership program. In the membership, I explain exactly what the driving tester at Raheny test centre wants to see you do. Click here to see more.
4. The turnabout for Raheny driving test route.
The turnabout I added to the Raheny driving test route-tips to pass video, is an extremely narrow road. I completed the turnabout in this Raheny test route in 5 attempts. This has never happened to me before in any driving test route I recorded. I wasn’t happy with my parking before this turnabout so I you do your turnabout here in a Raheny driving test route, be sure to park close to the curb, otherwise you won’t have enough space to complete the turnabout manoeuvre in 3 attempts. Check the video below to see the turnabout in great detail.
5. Turning right onto the coast road from Raheny driving test centre.
Last but not least, I want to show you this really confusing right turn coming from Raheny driving test centre. Turning right at the traffic lights here causes so much confusion for driving test applicants at Raheny test centre because sometimes the other drivers want to go offside to offside and sometimes they want to drive nearside to nearside. This is the only junction at Raheny test centre where this can happen. I usually tell students “let the other car make the move first, and you do as they are doing.”
The clip I have taking for the Raheny Driving Test Route-Tips To Pass video is taken from my YouTube Membership program.Click Here if you want to know how to pass your driving test at Raheny driving test centre.
Summary.
To conclude, this driving test route at Raheny driving test centre is extremely difficult and I recommend getting plenty of practice in to be prepared for your driving test at Raheny driving test centre.
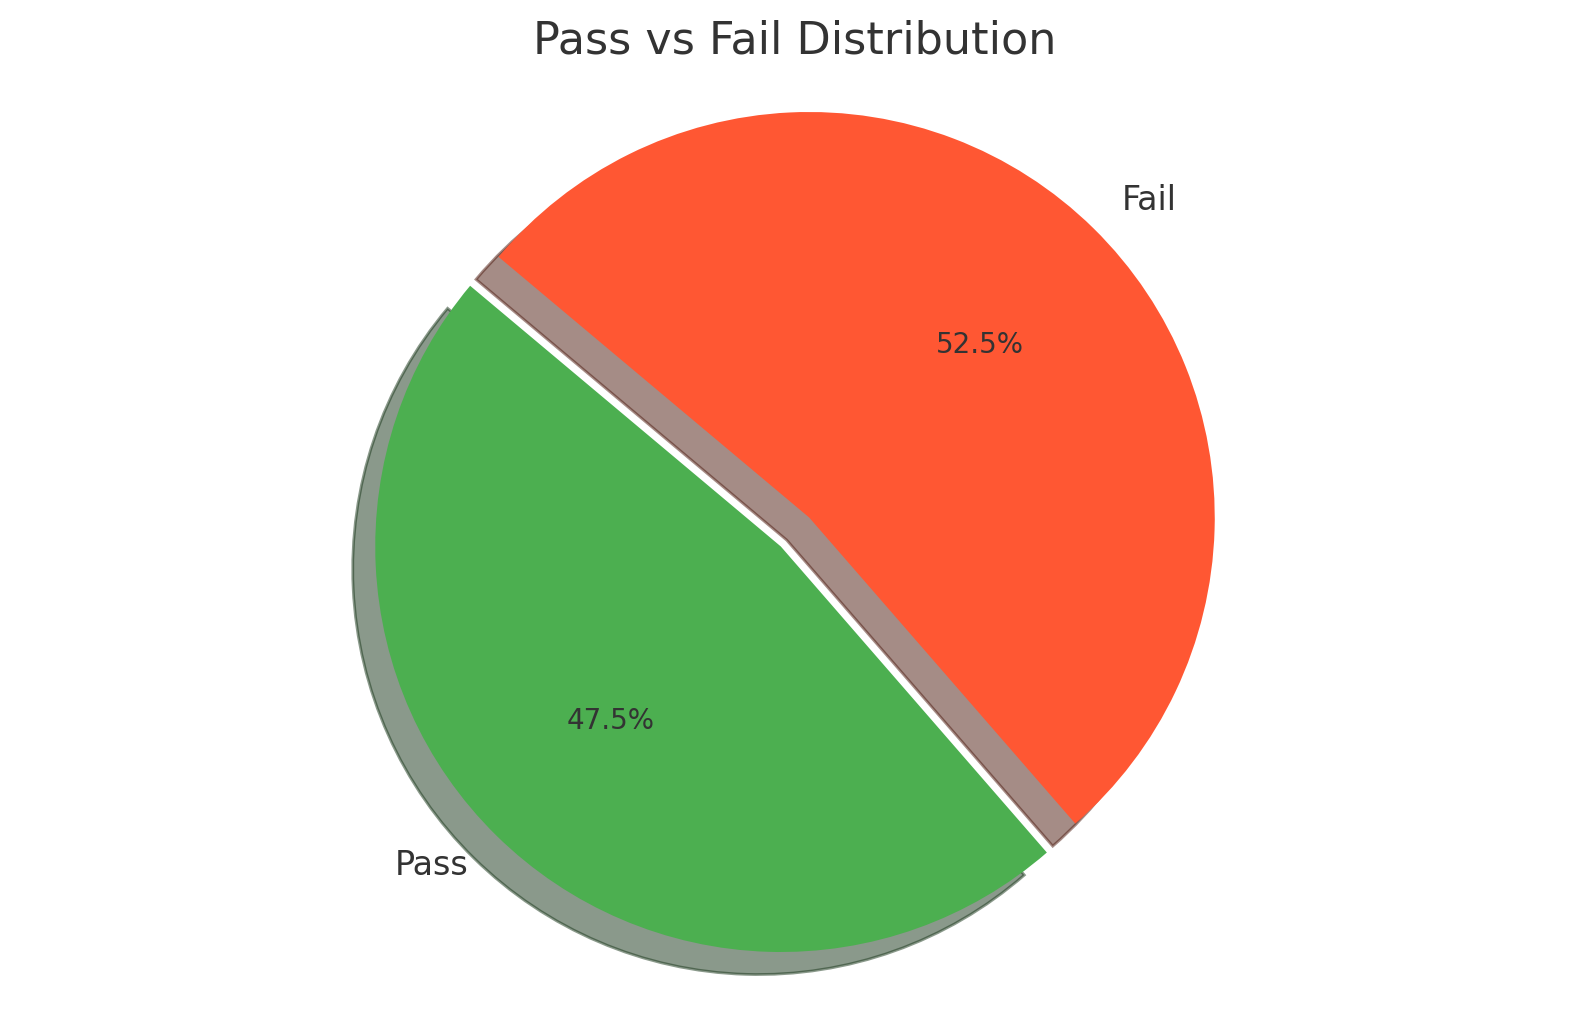
Pass rate at Raheny driving test centre.
How pass rates for the driving test compare by test centre.
Pass Rate 2022
%
Raheny
47.5
Book your driving test in Raheny Driving Test Centre
If you need to book your driving test at Raheny driving test centre, click here to access the RSA website.
Do you need help booking your driving test?
If you need any additional help with the booking process, click here for a helpful video.
Book driving lessons in Raheny.
You can click here to book driving lessons in Raheny for Raheny driving test centre.
Book pretest driving lessons in Raheny.
You can click here to book pretest driving lessons in Raheny for Raheny driving test centre.
Today’s video I will be showing you 5 tips to help you pass your driving test in Finglas driving test centre. The driving test at Finglas Jamestown Road is considered to be one of the harder driving test routes. There are multiple different driving test routes in Finglas and it’s hard to predict where the driving tester could take you in Finglas. Take a look at the video below showing you 5 of the top tips to help you pass your driving test at Finglas driving test centre.
If you would like to book driving lessons in Finglas, click the link below and fill out the form and we will do the rest
So many people fail their driving test in Finglas test centre for this alone. The driving tester would expect to see you come into the left hand lane but it can be difficult to know that because of the road layout. Remember in your driving test, the left hand lane would be the preferred lane. You can read the full break down of the marking sheet guidelines on the link below
Next we are going to talk about the mini roundabouts at Ballygall Parade. These mini roundabouts are extremely narrow and you will need to use all your skills to get around them safely. I do recommend using 1st gear for these mini roundabouts, especially when we are turning to the right. If you want to see the full Finglas test route where I tackle these mini roundabouts, you can watch the Finglas driving test route below
3.Turning Right At Traffic Lights into Ballymun
Next I will be showing you the junction where we will be turning right into Ballymun. Turning right at the yellow box junctions always causes driving test applicants problems. Applicants usually fail their driving test for progress at traffic lights for not going up to the middle of the junction at a green circle light. I created a video explaining exactly what to do when turning right at traffic lights, you can see the video below
4.Turning Right Onto The Ballymun Road
Next we will show you the correct way to turn onto the Ballymun road. People often fail their driving test for not doing this correctly. If you steer too early and drive in the right lane, will will get a grade 2 fault for position turning right. If you drive in the right lane for a short period of time you will get a grade 2 for position on the straight. If you continue to drive in the right lane you will pick up more grade 2 faults for position on the straight and you could fail your driving test if you get 4 grade 2 faults for the same thing
5. Reverse Around The Corner At Dunsink Avenue
In my opinion, this is the most difficult reverse around the corner I have ever done. It is on a busy road with lots of passing traffic. Also, the reverse itself seems to go on forever. It bends around a lot longer than most reverse around the corners and it never seems to straighten up. I recommend practicing this if you have your driving test in Finglas or Charlestown driving test centre.
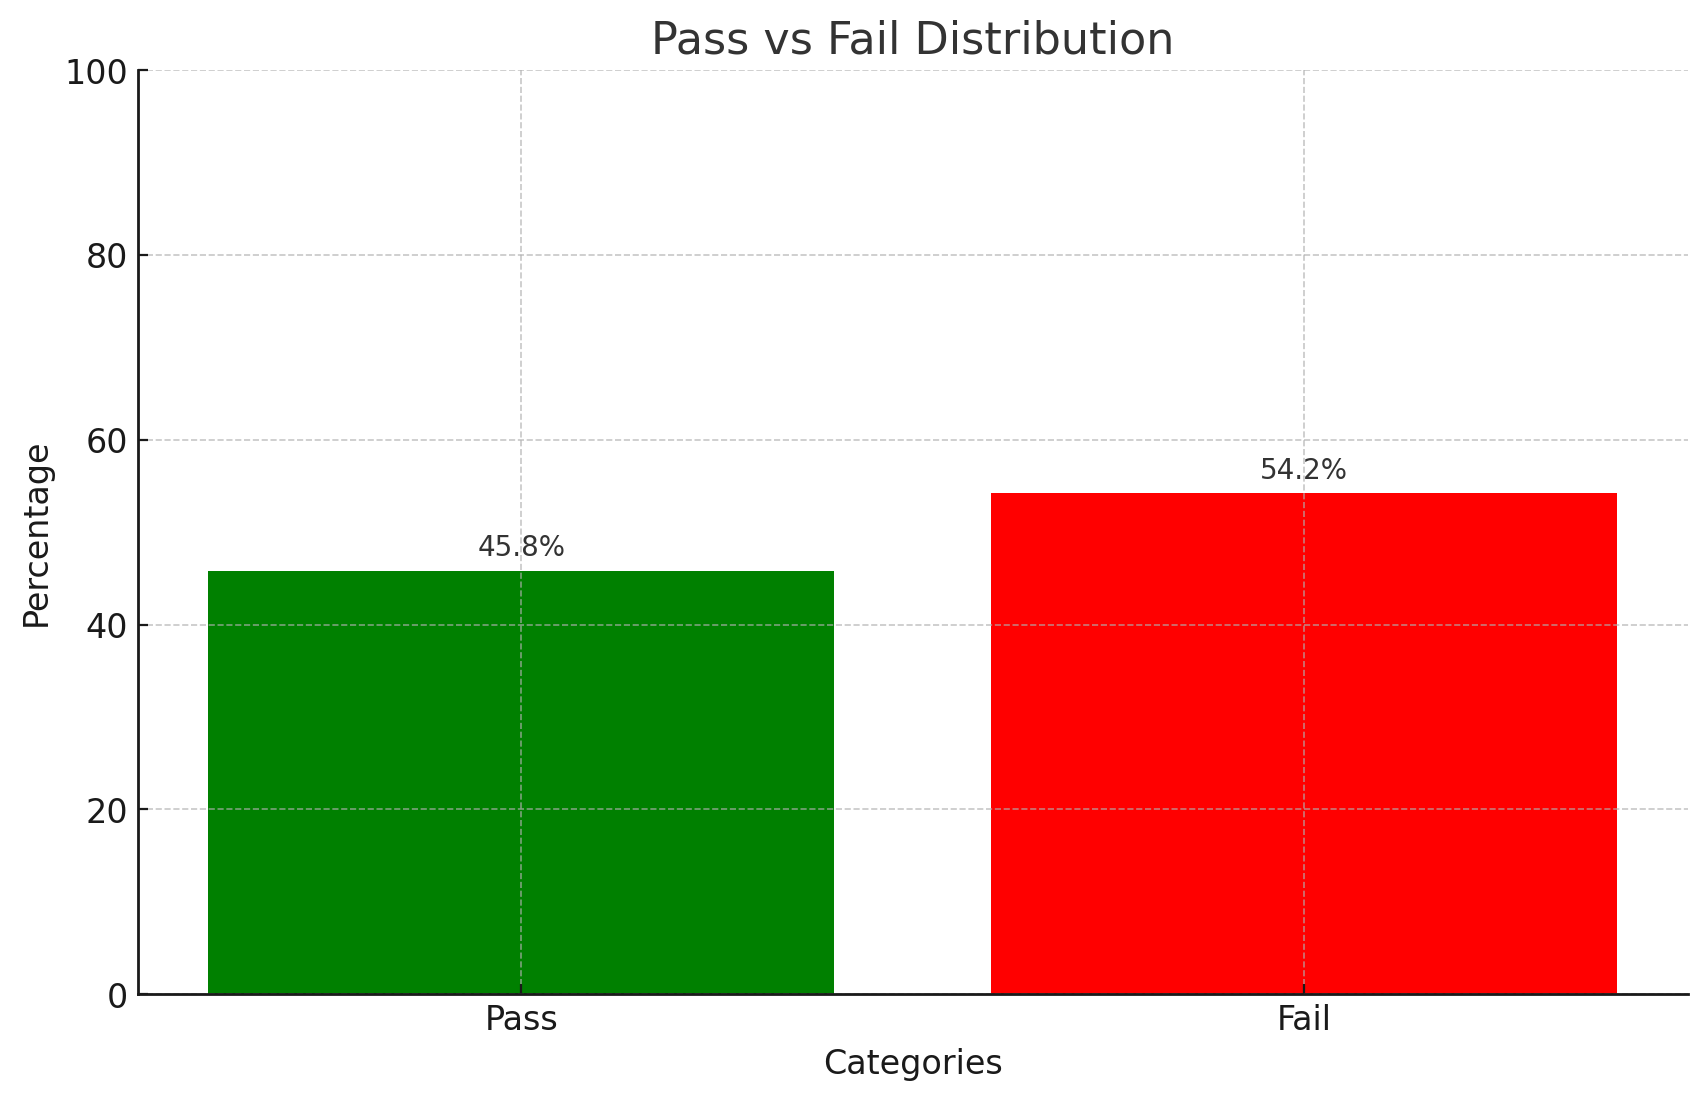
The pass rate at Finglas driving test centre is 43.6%. You can check this webpage on the link below
Today’s video we will be recording the newest Finglas Driving Test Route. The driving test at Finglas Jamestown Road is considered to be one of the harder driving test routes. There are multiple different driving test routes in Finglas and it’s hard to predict where the driving tester could take you in Finglas. Take a look at the video below showing you the latest Finglas driving test route.
If you would like to book driving lessons in Finglas, click the link below and fill out the form and we will do the rest
Take your time coming out of the test centre at Finglas Jamestown Road because it is a really busy car park with multiple students doing their driving test. Also, be mindful of the pedestrian crossing as you exit the car park and the 2 stop lines as you driving out of Finglas test centre.
2.Driving straight through the junction at Charlestown
This is extremely important and many people fail their driving test for driving across this junction in the wrong lane. It is very important to keep left and join the road opposite the junction on the left hand side of the road. I will leave a video below for 5 tips to help you pass your driving test in Finglas Driving Test Centre
3.Big roundabout in Finglas on the N2
This roundabout can be extremely busy and fast pace so you have to stay focused and progress when a safe gap appears. This will test all your skills so just remember correct observation on the roundabout and progress when it is safe to do so.
4.Reverse around the corner in Finglas
The reverse around the corner on this driving test route is by far the most difficult reverse around the corner in the Finglas test routes. It seems to go on forever and it never really straightens up. It is also on a really busy road so just remember your correct observation and yield right of way when traffic approaches from behind. You can watch this really detailed video on how to reverse around the corner
5.Merging onto the N2
This Finglas driving test route seems to go everywhere in Finglas. We then drive all around Finglas west but then also merge back on the N2 and back to the test centre this way. It is an extremely long and difficult route and you will need to demonstrate focus and discipline all the way back to Finglas test centre
The pass rate at Finglas driving test centre is 43.6%. You can check this webpage on the link below
Today’s video I will be showing you the newest route we recorded for Mulhuddart Driving Test Centre. The driving test at Mulhuddart Maxol N3 is considered to be one of the harder driving test routes. There are multiple different driving test routes in Mulhuddart and it’s hard to predict where the driving tester could take you in Blanchardstown. Take a look at the video below showing you the latest Mulhuddart driving test route. This Mulhuddart test route could help you pass your driving test but it is not guaranteed the driving tester will bring you this way
If you would like to book driving lessons in Mulhuddart, click the link below and fill out the form and we will do the rest
1. Coming out of the driving test centre in Mulhuddart
Unfortunately I was not able to demonstrate coming out of the driving test centre in Mulhuddart because there was a lot of people preparing for their driving test and I didn’t want to be in their way. If you watch my previous Mulhuddart test routes you will see me exit the test centre. Just be mindful there is a stop line coming out of the test centre.
2.Turning left onto the N3
This is where it gets really exciting. As we come onto the N3 National Road around the N3 Maxol, we need to increase our speed up towards 100kmph and merge safely onto the national road. If it is safe to do so, the driving tester will expect you to get up towards the speed limit of 100kmph
3.Tricky left turn without coming into the bus lane
Next we have a really difficult left turn where we would want to avoid the bus lane. Try to wait until the road markings break before we make this left turn. Also, be sure to check your left mirror for buses, taxis or motorbikes/cyclists.
4.Reverse around the corner
The reverse around the corner is in a difficult spot here on a slight bend. There are also lots of cars driving through this estate so be mindful of your observation and yield right of way to traffic coming from behind. You can access a really helpful video below for tips and tricks when you are reversing around the corner
5.Roundabout at Blanchardstown Shopping Centre
Tackling the roundabout at Blanchardstown shopping centre is very common when you do your driving test at Mulhuddart driving test centre. It is a busy roundabout so you will have use all your skills when attempting this roundabout. Be sure to practice on this roundabout with your driving instructor or sponsor.
The pass rate at Finglas driving test centre is 45.8%. You can check this webpage on the link below
Today’s video I will be showing you 5 tips to help you pass your driving test in Finglas driving test centre. The driving test at Finglas Jamestown Road is considered to be one of the harder driving test routes. There are multiple different driving test routes in Finglas and it’s hard to predict where the driving tester could take you in Finglas. Take a look at the video below showing you 5 of the top tips to help you pass your driving test at Finglas driving test centre.
If you would like to book driving lessons in Finglas, click the link below and fill out the form and we will do the rest
If you turn right as you come out the gate at Finglas test centre, there is a high possibility that you will take the first left onto Clancy Avenue. This left turn strikes fear into students because it is so sharp and you have to slow it all the way down and use 1st gear. Even when you do this, there is a high possibility that you could clip the path with your rear left wheel so this turn takes a lot of practice to be able to perfect it
2.Turning right down through Finglas Village
Next I show you how to turn right down through Finglas Village. In my opinion, this is the hardest right turn at any driving test centre I have ever done. It is extremely difficult because it is always so busy in Finglas village and it is actually the second right turn you will see. Be very careful here as other road users will try to overtake you on the outside lane. I covered this full driving test route in Finglas and you can see that Finglas Test Route below
3.Mini roundabouts in Finglas
Next James fills us in on all the mini roundabouts in Finglas driving test routes. I covered so many mini roundabouts in my videos for Finglas test centre and you will see all of these videos and the bottom of this post or on my Youtube.
4.Charlestown Shopping Centre
So many people fail their driving test in Finglas test centre for this alone. The driving tester would expect to see you come into the left hand lane but it can be difficult to know that because of the road layout. Remember in your driving test, the left hand lane would be the preferred lane. You can read the full break down of the marking sheet guidelines on the link below
Last we talk about the big roundabout on the N2 at Lidl. This roundabout causes a lot of uncertainty in learner drivers just because of the size of it and the volume of traffic using it. When tackling this roundabout you have to be alert and ready to pounce at the first safe gap in the traffic
The pass rate at Finglas driving test centre is 43.6%. You can check this webpage on the link below
5 Tips To Help You Pass Your Driving Test At Kilester Driving Test Centre
In today’s video I will be showing you 5 tips to help you pass your driving test at Kilester driving test centre. The driving test in Kilester can be very challenging. Lots of people fail their driving test in Kilester for not knowing these tips. Take a look at the video below to see the tips and tricks to help you at Kilester driving test route.
Book your Driving Lessons in Kilester
If you would like to book driving lesson for the Kilester driving test route, please click here
1. Turning right at the traffic lights beside Kilester test centre.
In the very first clip in the video above, I show you how to turn right at the traffic lights near Kilester test centre. People generally get really confused here and students never know the speed limit on the new road. Remember, if we dont see a new speed limit sign, the speed limit is the same as the last road you were on. This road will be 50kmph
2. Grade 2 fault for observation on a roundabout
Next I show you were students generally pick up grade 2 marks for observation on the roundabout in Kilester test route. We can see in the second clip, we approached a mini roundabout with no road out to the right. The driving tester in Kilester will still expect you to look out to the right, even if there is no road. Observation at the roundabout is always the same, we need to look to the right
3. Driving in the cycle lane in Raheny village.
In the third clip for 5 tips to help you pass your driving test in kilester, I show you were you would be expected to drive in the cycle lane in Raheny Village. Because this cycle lane has a broken white line, all traffic may make temporary use of the cycle lane. On your driving test in Kilester, the tester may advise you do this if you don’t know.
4. Turning right at the yellow box junction
Turning right at the yellow box junction can be extremely tricky. This right turn in Kilester test route often catches students out just because it is an extremely fast and busy right turn. Check the video below to explain how to turn right at the yellow box junction below
5. Turning right at Kilbarrack Dart Station
Last but not least I show you how to do this extremely difficult right turn at Kilbarrack Dart Station. So man people fail their driving test here for cutting the corner and driving over these road markings. It is so unusual and really confusing if its your first time doing this turn. Click the link below to see the location on this right turn on google maps
Are you thinking about booking EDT driving lessons in Blanchardstown? Booking your driving lessons in Blanchardstown has never been easier. If you fill in the link on the line below, I will personally reply to your query and have a driver to you within 2 weeks.
1. Book your Driving Lessons in Blanchardstown
If you would like to book driving lesson for the Blanchardstown driving test route, please click here
2. Book your driving test in Blanchardstown
If you need to book your driving test at Blanchardstown driving test centre, click here to access the RSA
3. Do you need help booking your driving test?
If you need any additional help with the booking process, click here for a helpful video
4. Helpful video below of Patrick and I recording Mulhuddart Driving Test 1
If you have your driving test in Tallaght, these routes will be very beneficial for you. I recorded all of these routes in 2023 and they are the newest and most up to date. The driving test in Tallaght can be very difficult. The routes are very busy. There can be loads of big roundabouts and lots of turning right at yellow box junctions.
If you would like to book lessons/pretest in Tallaght, please click here
If you need to book your driving test at Tallaght driving test centre, click here to access the RSA
If you need any additional help with the booking process, click here for a helpful video
Book A Mock Driving Test Dublin-Mock Driving Tests Dublin
Booking a mock driving test a few days before your actually driving test can be very beneficial to you. In these mock test lessons we act as tho you are doing your actual driving test and I only give you directions instead on instructions.
I would recommend doing a pretest or 2 before booking one of these mock test lessons because you don’t really learn much on the drive and I tell you the faults at the end. It can be hard to remember certain things by the time the end of the lesson comes around.
I hope you enjoy these mock test videos below. I recorded all these for Tallaght driving test centre in Dublin.
If you would like to book lessons/pretest in Dublin please click here